
Did you ever find yourself in a situation in which you needed to make a lot of changes to a campaign, be it ad copy or targeting? We sure did, and it can get quite frustrating if you don’t have the proper tools to work with.
Throughout time, we have tried to find ways to boost our campaign performance and optimize implementation time for our clients. In our experience, using both the browser and desktop versions of Google Ads, we have found out that the Google Ads Editor can be a powerful tool that can save you a lot of time.
We will go ahead and share with you the 5 ways in which we are using Google Ads Editor to increase our productivity, but before that we will go a little bit back to the basics and talk about:
What is Google Ads Editor
Think of Google Ads Editor as an offline (or desktop) version of the “regular” Google Ads, that you can access through your web browser. It has similar features as the browser version but it comes with a great advantage, more precisely, the power to download all the campaigns on your PC and make changes offline.
Where do you get Google Ads Editor
If you want to download the Google Ads Editor, you can do so by accessing this link. This tool is free and it allows you to access any account to which you already have access in the browser version.
What is Google Ads Editor used for
When it comes to use cases it’s more of a situation where you can be limited by your particular situation and creativity, rather than functionality.
As mentioned before, Google Ads Editor is a very powerful tool and it offers all the features of the browser version. You can create campaigns in the editor as you can in the browser version but, as we’ve said before, we have tried to find the best uses for the editor, uses where it can be used to improve your implementation time, as well as campaign performance.
Without any further ado, here are the 5 ways you can get the most out of Google Ads Editor:
I. Cross-Account Campaign Migration
This might seem a little bit odd, after all, why would I want to import campaigns from one account to another?
Well.. there are multiple scenarios where this feature might save you time, and here are 2 examples:
- Say you want to expand your online shop to another country. You already have set the account architecture (campaigns, ad groups, keywords, ads) for the country you are already selling in and you want to use the same architecture (or template) for the new country.
- You have multiple accounts, for example a regular Google Ads account and a Google Ad Grants account. You see that some campaigns perform very well in the Ad Grants account and you want to move them in the regular account in order to be able to raise the bids (Grants Account has a set limit of $2 per click, which can drastically limit your visibility on the targeted keywords).
This is a perfect opportunity to use the Google Ads Editor, below you will find the steps you have to take in order to move campaigns from one account to another. Just to make it clear, you are not limited to importing only campaigns, but you can import keywords, ads and more as well.
Steps to import campaigns into other accounts
1. Open the required accounts
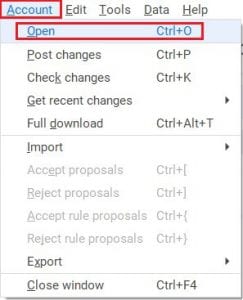
After opening Google Ads Editor on your computer, select “Account” -> “Open” or simply use the keyboard shortcut “Ctrl + O”.
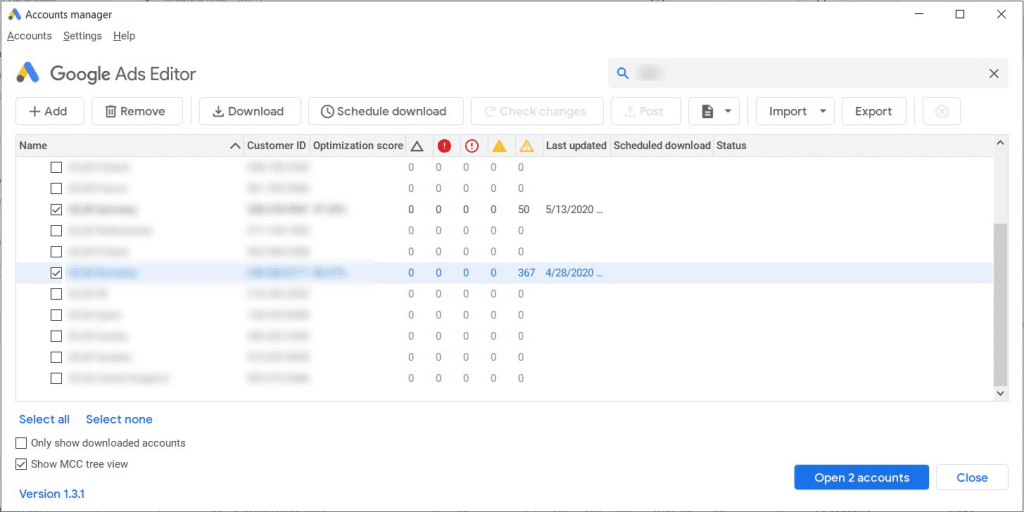
Select the account that contains the campaign you want to import and the account you want to import the campaigns to and click “Open accounts”. You can open more than 2 accounts if you want, depending on the specific use case.
2. Select and copy the required campaigns
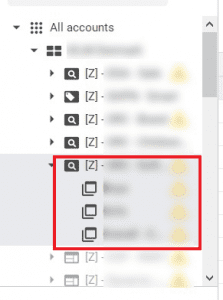
After opening the required accounts, they will be shown in the upper left side of the screen.
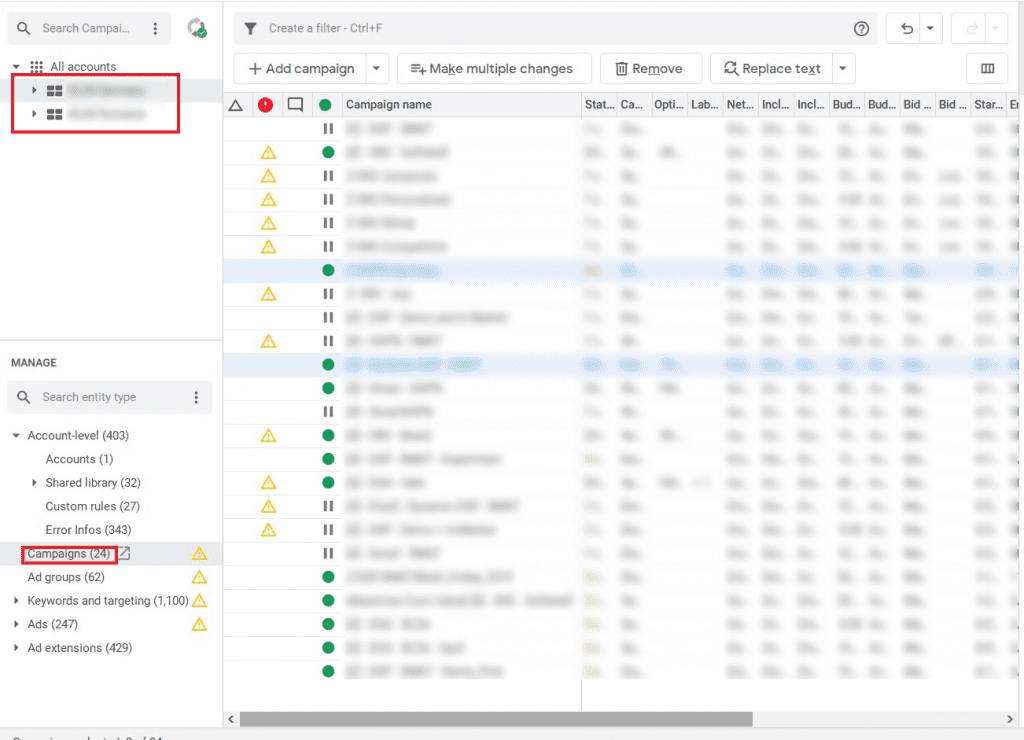
Select the account from which you want to import the campaigns from. Make sure that “Campaigns” is selected from the “MANAGE” tab.
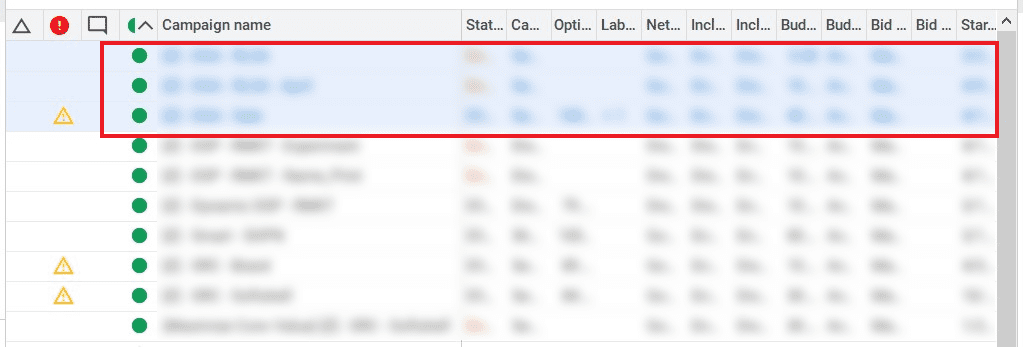
Select the particular campaigns that you want to import. You can do this by clicking on individual campaigns while the Ctrl key is pressed or you can make a bulk selection by clicking on one campaign from the list while keeping the Shift key pressed and selecting another campaign. The latter will select all the campaigns between the first selected campaign and the last.
In order to perform the copy action, you can right-click on the selected campaigns and select Copy, or you can simply “Ctrl + click”.
Bonus tip: Always remember to get recent changes when you start working in any account. It’s a good practice to do it when you open an account, it will become a habit, just press “Get recent changes” -> “More Data” and wait for the system to bring all the data. Alternatively, you can use the shortcut “Ctrl + Shift + T”, it will save you a lot of trouble.
3. Import the selected campaigns
After you have successfully selected the campaigns, you will need to navigate to the account in which you want to import the campaigns to. In order to do this select the other account under “All accounts”. Once more, make sure that “Campaigns” is selected from the “MANAGE” tab.
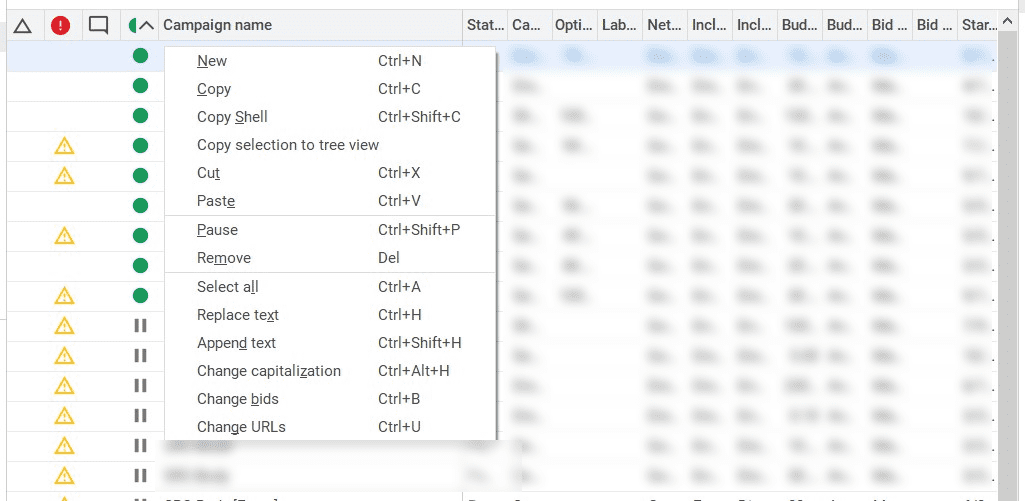
In order to perform the action of importing the campaigns, simply hover over the campaign screen and right-click on“Paste” or use “Ctrl + V”.
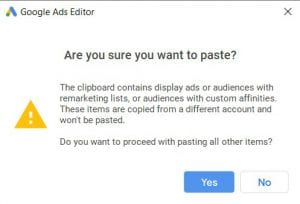
A pop-up message will appear, just click “Yes”.
If you followed the steps correctly you will have your campaigns imported in the new account. Congrats!
Just make sure you make the required changes (targeting, ad copies, campaign structure, etc.).
II. Ad Copies Bulk Edit
This feature might come in handy when you decide to create and test new ad copies or when the client asks for ad copies changes.
Changing ad copies in the browser version can be an excruciating experience when you have a slow internet connection or when the Google server cannot simply keep up with all the throughput.
In order to bulk edit your copies you will need to select them and then make the required adjustments.
Rather than showing you how to update the individual ad elements (titles, descriptions, display URLs), which is pretty simple. I am going to show you how to find particular parts of the ad copies and update / modify them.
Let’s say that there has been a change in the category sale price from 30% off to 35% off. That is great for customers but how are you going to accomplish this?
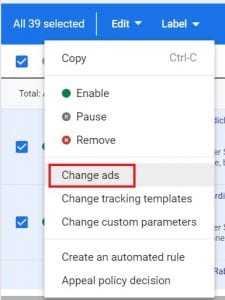
For once you can go into the browser version, select the required ads, click “Edit” and from the drop-down menu select “Change Ads”.
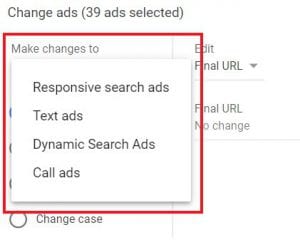
You will be greeted with a screen, which will prompt you to select the campaign type and the action you want to accomplish. Note that if you have multiple campaign types, you will have to do the same action for every campaign type that you have. Pretty complicated, eh?
Well that’s not all… unfortunately…
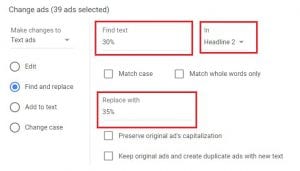
The last step is to input the following: the text you want the system to identify, the exact location of the text (headline, description, etc.) and the replacement text. For our example, those are: 30% in Headline 2, replace with 35%.
This is so complicated, there must be an easier solution, and fortunately, there is Google Ads Editor (I know, not really a shocker in an article about the Editor, but hey… an introduction is an introduction, right? 😎).
Let’s get right to it how save time editing ad copies in Google Ad editor:
The process:
1. Open the desired account and select the campaigns / ad groups that contain the ads you want to update.
2. From the MANAGE tab select the proper ad type
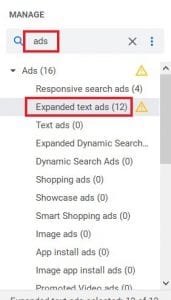
Tip: You can simply enter the desired type in the search bar, it can save you time opening all the drop-down menus.
3. Select all the ads you want to modify
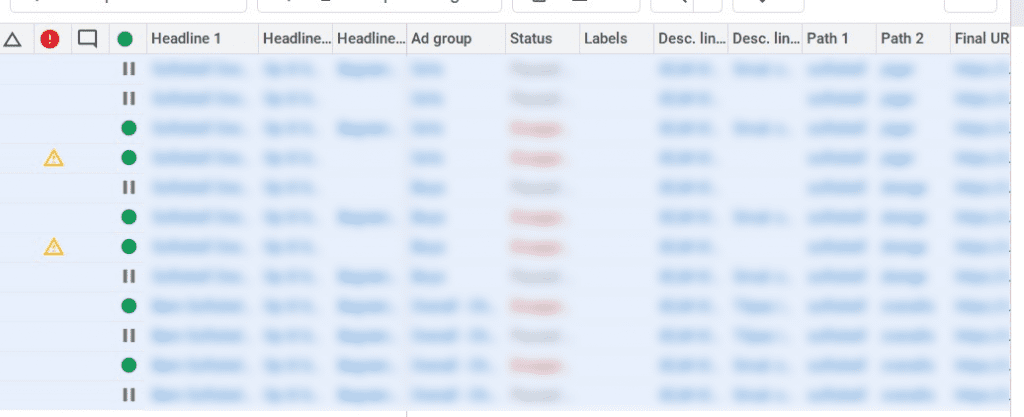
Tip: If you want to select all the ads at one you can simply use “CTRL + A”.
4. Select the replace text tool under the filter bar

5. Change the desired text
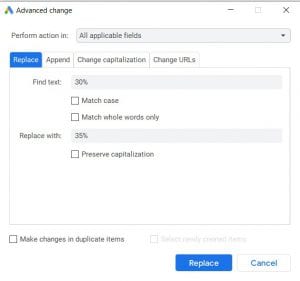
A pop-up screen will appear with a similar configuration as the one in the browser version. Here you will have to input the text which you want to modify and the text which you want to be used as replacement.
Click “Replace” and you are done.
Although there are 5 steps laid out above, the process is very smooth and fast. One you get used to it, it’s like a second nature.
Oh… and one more thing, have I forgotten to mention that the change is instant? Once you click “replace”, you won’t have to wait for the change to be saved and the interface to load again. It’s just saved.
III. Final URL Mass Update
In a similar case with the one presented above, let’s say that the technical team informs you that the URL structure on the website has changed.
This is a critical situation especially when it’s unannounced. First of all, you should consider pausing all the campaigns (this is absolutely necessary if there are no redirects in place to the new URLs).
Secondly, you should update the final URLs of the ads as fast as possible to assure a downtime as small as possible.
You could go on the classical route to the browser version but when dealing with big accounts that’s not really a solution in a situation like the one described above. You might want to consider the editor.
The process is pretty straightforward; you should follow the steps 1-3 described at the previous section, in order to select the required ads.
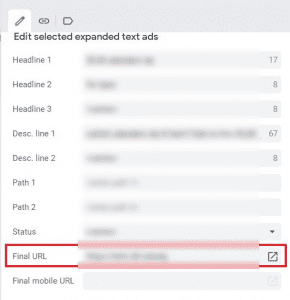
After the ad selection, you should find the “Final URL” field on the right side of the screen. Here you will be able to input the new URL for the selected ads.
IV. Bulk location targeting
Adding location targeting for the majority of the campaigns can be a breeze, as you have to input just a general area (country, region or city). There is no need for advanced tools like the editor here, all can be accomplished in the browser version.
But what do you do when you have to advertise for a large retailer with multiple locations and nation-wide coverage?
This situation gets tricky, so we recommend adding multiple individual locations (cities and regions) and radius targeting, in order to unlock the power of location bid adjustments. This will give you the ability to go the extra mile in improving the performance of your campaigns.
Let’s say that you have already added the required location targeting to a particular campaign in order to see if you can improve its performance by adjusting the bid modifiers. After a week, you conclude that the experiment is successful and you want to apply the same targeting to more campaigns. But how?
First of all, you can simply go into the other campaign setting and manually input all the targeting criteria that you want, but this is very time consuming, especially for wide geographical areas and multiple store locations. What you might want to consider is simply copy-pasting the targeting using Google Ads Editor.
In order to achieve this goal, you should:
1. Select the desired campaign
I won’t add any further images for this now, if you’ve followed the previous suggestions, you are already a master of selection in Google Ads Editor!
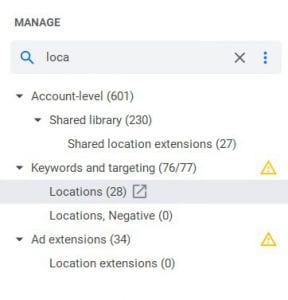
2. Select “Locations” from the MANAGE tab.
3. Select and copy all the desired locations
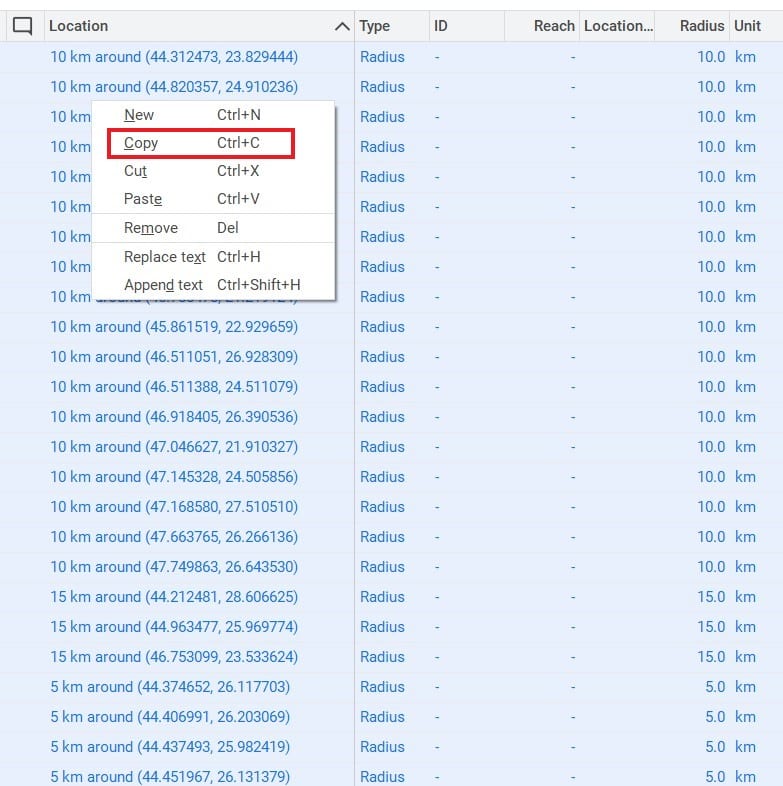
4. Navigate to the campaign in which you want to add the location targets and paste those
Now you have successfully added the new targeting locations to the desired campaign. Don’t forget to post those updates or else they won’t go live.
V. Offline Work Environment
This section speaks by itself. The Editors practically store an offline version of your account structure. You might, in some situations, benefit from having the ability to work on your campaigns when you have no internet connection.
I know, we live in a connected world, and the idea of no internet connection is, fortunately, on the verge of extinction. But there are still situations and places where you cannot connect to the internet, like airlines or regions where there is no internet coverage.
In those situations, the Google Ads Editor can be a key tool in your inventory. It will allow you to make all the changes you want while having a connection, those changes will be stored on your device and when you regain the connection to the internet, you can simply post all the changes you’ve made.
Final Thoughts
Google Ads Editor is a versatile and powerful tool that helps you save time and increase performance. There are many more use cases unexplored in this article but this is a condensed version of our knowledge and best use cases that we found for it.
Hopefully, you will make great use of it and it will help you improve your productivity and performance!
We, at Zitec, are offering a wide array of digital services for our clients, ranging from the initial audit to strategy creation, tracking architecture implementation, Pay Per Click advertising (Google, Facebook, Instagram, Bing, LinkedIn, you name it), Search Engine Optimization, Search Engine Optimization, social media management, data analysis & reporting.
We are a team of 14 digital natives specialized in different areas of digital marketing and together have years of experience offering quality services to our clients. You can find out more about our services and clients following this link.
Also, if you are interested in getting in touch with us, we can set up an online or offline meeting, you can find our contact information here.

Share via:


.jpg)